Showing posts with label baking. Show all posts

Thursday, January 5, 2012

Cooking Class | DessertTruck Works macarons & soufflés

Happy Belated New Year to the readers of Four Tines and a Napkin! Just wanted to start this post by saying this will be my last full, unabridged post for 2011 food happenings. Stay tuned for "Best Things I Ate in 2011," a few "Best Of" lists, and a conglomeration of "Blog-Shy" posts during 2011.

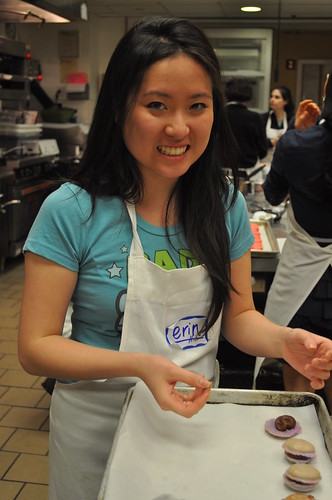
After taking the advanced baking class, "Classic French Macarons," at the Institute of Culinary Education, I stumbled upon a Groupon deal for a macaron-baking workshop at DessertTruck Works (DT Works). While Marcus and I learned quite a bit behind the "science" of creating the perfect macaron, it was still a lot of information overload, and attempting to make any on our own would still be a cloudy endeavor. As such, I felt a fresh new perspective from a rather hip and fun bakery like DT Works would help us better grasp "the moodiest cookie in the world" (as dubbed by our instructor at ICE). This was back in June.

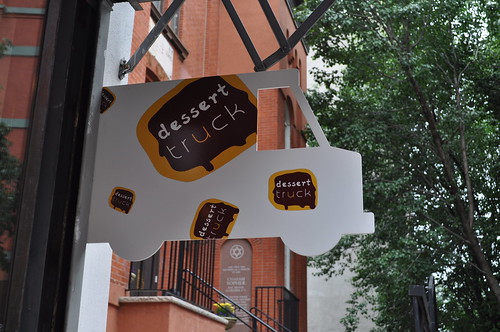
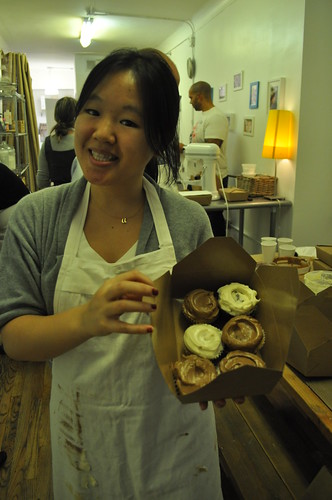
As I've mentioned before in my Macaron Day 2011 post, Jerome Chang, former sous pastry chef at Le Cirque, left in 2007 to start DessertTruck, a high-end dessert truck at "dressed-down" prices, with his business school friend, Chris Chen. It became a smashing success, leading them to open up this store front, DT Works, on the Lower East Side with two former Le Cirque alumni, Susana Garcia and Vincent Jaoura.

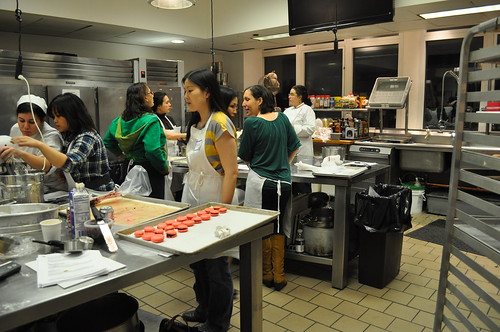
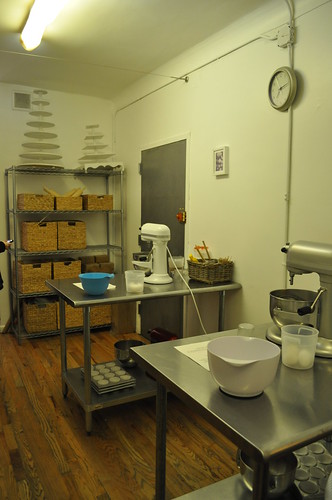
Inside DT Works, with an "island" baking prep station set in the middle of the shop, ready to be used by workshop participants.

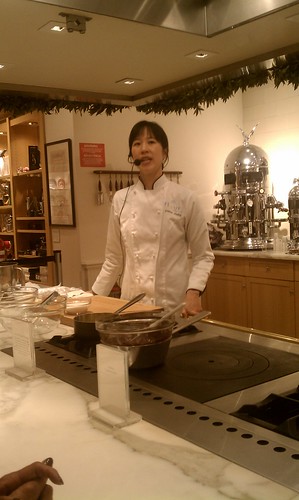
Chef Chang started off the class immediately with a brief introduction about the macaron, how it is typically prepared in the culinary universe, and his experience with it as a pastry chef. He also asked if anyone had attempted to make them, and if they had, what problems had they run into. Then he followed this discussion with how we'd be addressing those problems in the workshop. He was very easy to understand as he was very straightforward with the process. Also, throughout the class, Chef Chang addressed many, if not all, of the "things that could go wrong" during the baking process. For these reasons, this workshop is great for beginners that are hoping to learn something as advanced as baking macarons.

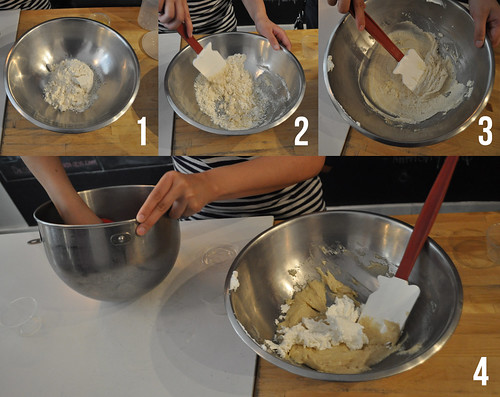
We began by preparing the meringue. {1} After briefly whisking 50 grams of egg whites in a large heat-safe bowl, we put it over a {2} simmering water bath, whisking together with approximately 1/3 of 110 grams of granulated sugar. We then continued to gradually add the remaining sugar, {3} as the whites increase in volume, whisking until hot to the touch. {4} Removing it off heat, we continued whisking until the meringue became stiff.

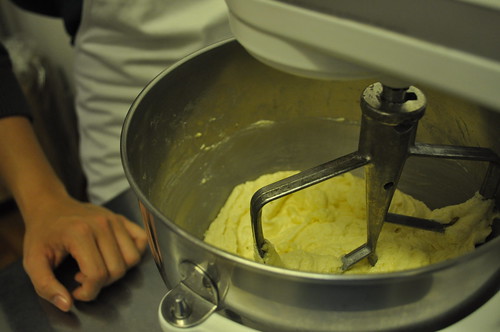
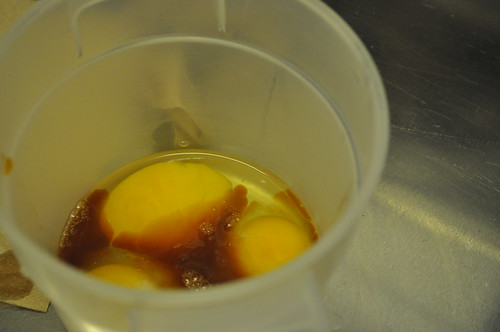
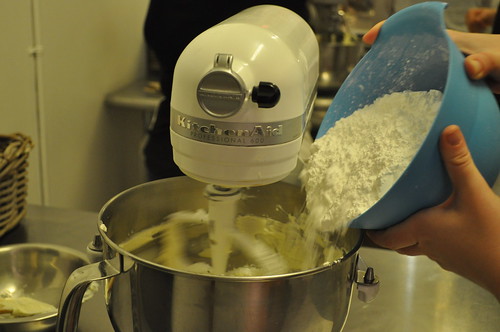
{1} We were given a well-mixed bowl of 125 grams of blanched almond flour and 125 grams of confectioner's sugar, already blended in a food processor for 20 seconds, with no lumps. We finished the macaron mixture by {2} using a rubber spatula {3} to mix in another 50 grams of egg whites into the almond flour mix. {4} Next, we folded the meringue into the almond flour mixture, until it was all well-incorporated into the meringue, regularly running the spatula along the very bottom of the bowl. The final mixture was homogenous with a thick viscosity -- if anyone had a mixture that was too stiff, they added about 1 tablespoon of egg white at a time until the proper consistency is reached.

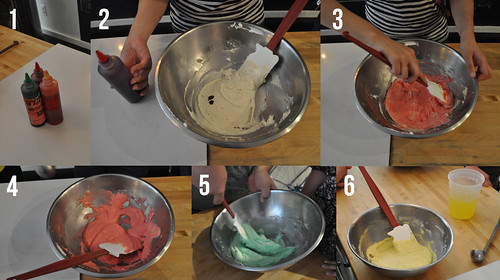
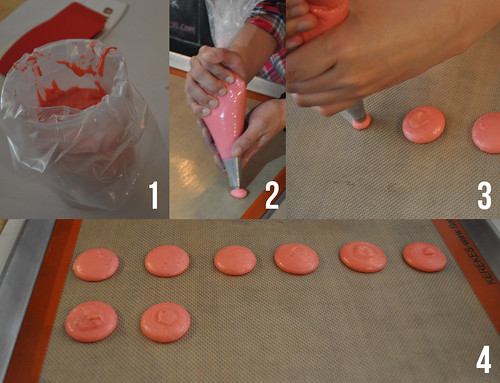
{1} After finishing creating the macaron mixture, Chef Chang gave us a choice of three shades of food coloring to add to the mixture -- red, green, and yellow. {2} Marcus and I picked red, adding few tiny drops to be sufficient. {3} We all thoroughly mixed the food coloring into our mixtures until {4, 5, 6} an even shade was produced.

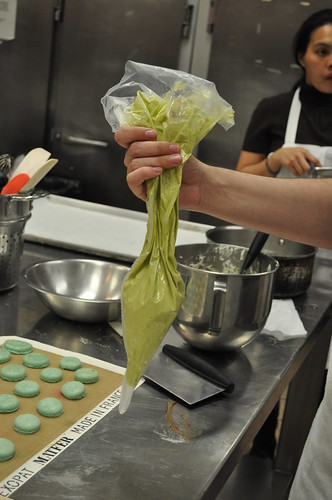
{1} As far as piping goes, Chef Chang showed us an easier way to transfer the macaron mixture into a piping bag fitted with a straight tip (size #805) inside. He put a piping bag over a solid, plastic container that was deep enough to hold up the piping bag with most of the macaron mixture. {2} Cutting an appropriately sized hole and onto sheet pan (18" x 13") lined with a Silpat baking mat, we piped silver dollar-sized disks, {3} keeping the piping tip about 1.25" away from the surface of the sheet pan to ensure rounded tops of the macaron disks. {4} Normally, we would set the sheet pan aside to allow the surface of the macarons to dry (anywhere from 30 minutes to two hours, depending on the humidity). In a preheated oven at 300 degrees Fahrenheit, the macarons were baked for approximately 7 minutes, turning the pan halfway through the duration. The macarons are typically "deemed finished" when the tops are firm and dry, and the "foamy" base is dry as well. Upon completion, let the sheet pan with the macarons cool.

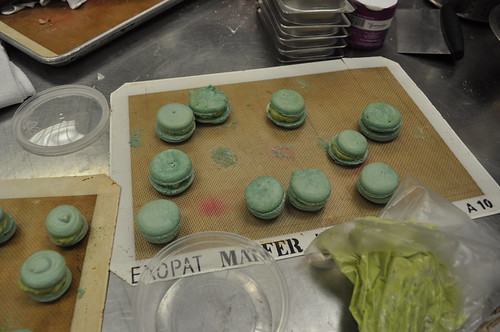
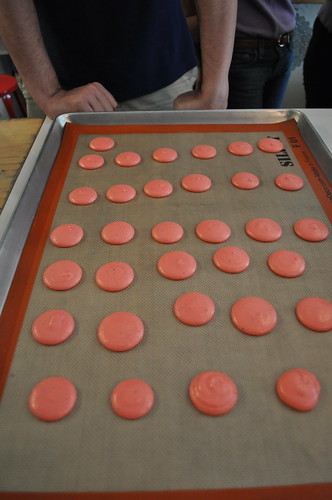
Marcus and I's finished sheet pan with piped macaron disks.

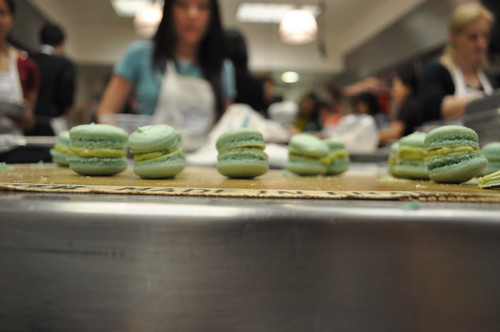
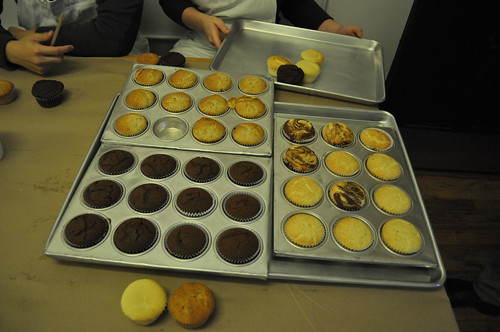
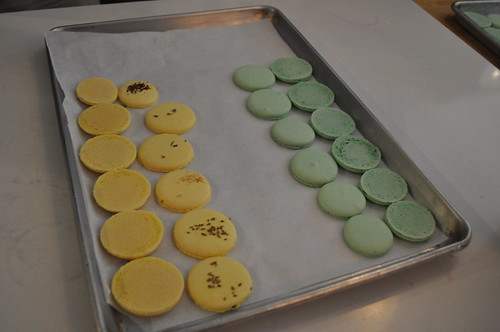
However, due to time constraints of the class, Chef Chang had macarons, baked and ready for us to which we would add center fillings. He removed the macarons by gently running an offset spatula underneath each one. Each macaron was then paired by size, lined up next to each other with one facing up in each pair.

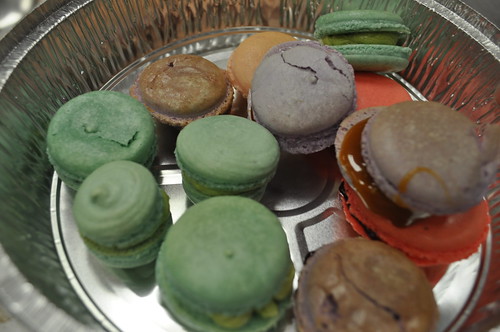
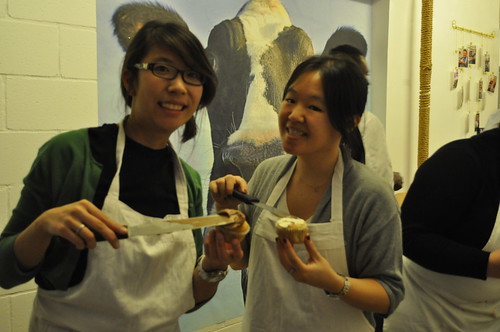
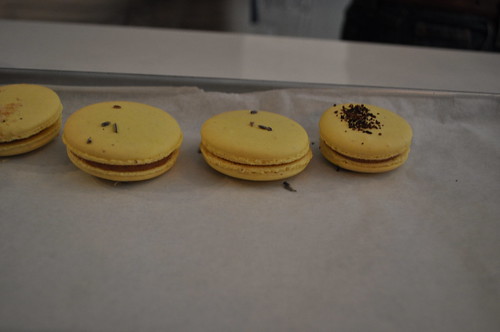
We piped our desire filling (our choice of buttercream, marmalade, and ganache) onto one half of the macaron pair, then sandwiching each with the other half of the pair.

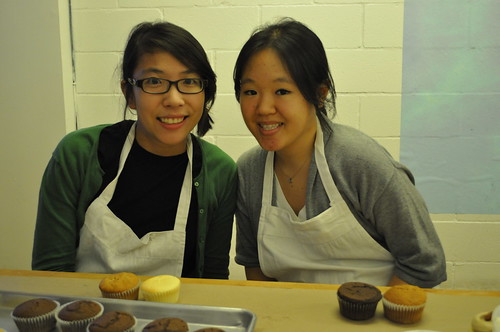
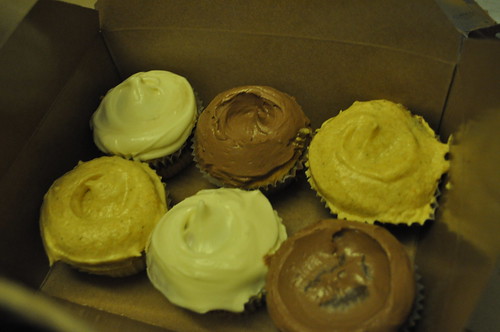
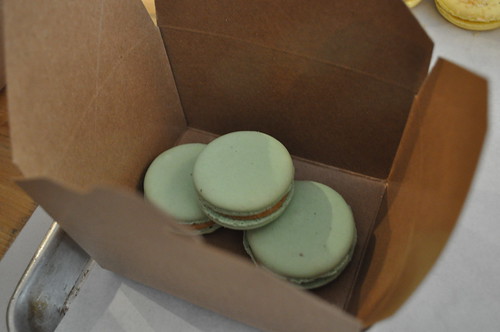
So woohoo! We successfully "made" macarons at DT Works, leaving with a half dozen each!

Several months later in October, I found another class deal offered for DT Works on Groupon, but this time for a chocolate soufflé-making class. I immediately nabbed two Groupons (one for me and one for Marcus) for this deal and signed up for the next available class in December. Since we had such a great experience with Chef Chang during the macaron-baking class -- he's a great teacher (as I've already illustrated above), especially for beginners for he is very precise, succinct, extremely knowledgeable, and patient -- I figured tackling something as notoriously challenging as making chocolate soufflés would be something he would teach very well, too. Plus, I've always wanted to learn how to make a great soufflé (I've never attempted before this class, actually), but I've always been too intimidated to do so. This was my chance to do it (and to do it right)!

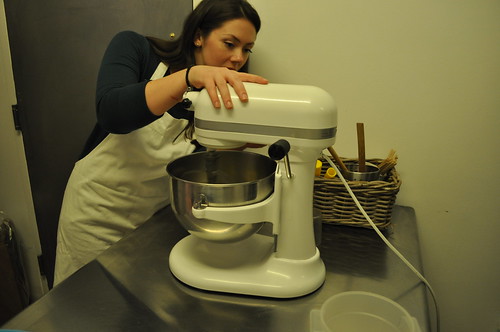
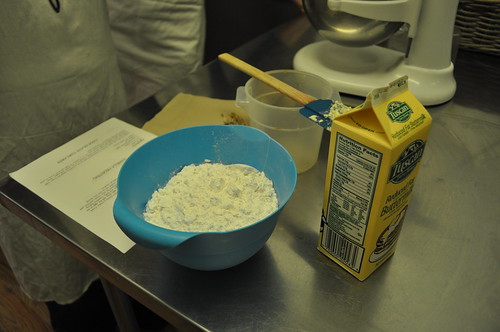
The same "island" prep station inside DT Works, laden with the first ingredients and tools needed for the first steps of the soufflé recipe. Similarly to the macaron-baking class, Chef Chang discussed the history behind the finicky yet coveted dessert, debunked some common "myths" behind it, as well as his experience with this particular dessert. He also told us the recipe we would be using is adapted from the one used for the chocolate soufflé served in the past at Le Cirque.

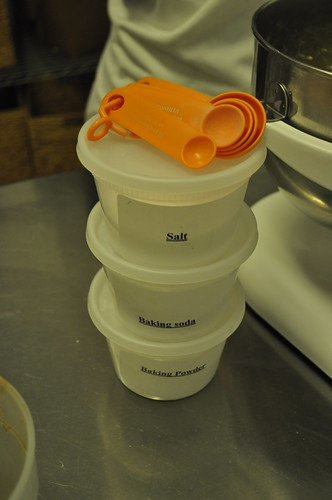
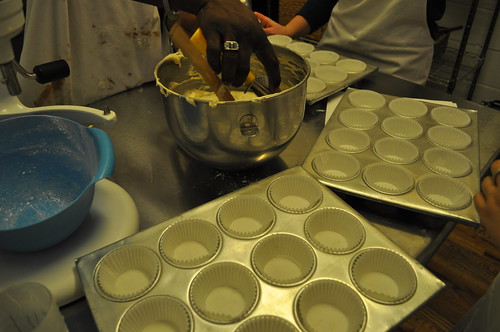
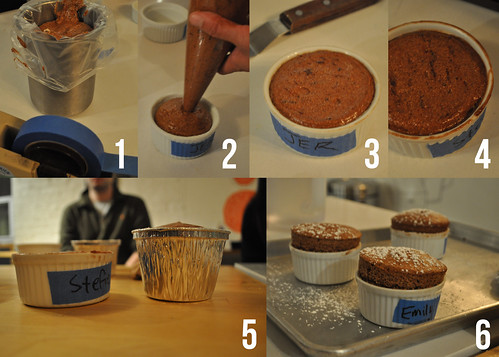
After preheating the oven to 375 degrees Fahrenheit, Chef Chang had us {1} label our ramekins with some painter's tape, writing our names in marker over it and adhering it to the side. {2} Then we brushed the interior of our ramekins generously and thoroughly with softened butter (about 4 tablespoons), ensuring the entire interior was buttered (including the rim), followed by coating the buttered ramekin with sugar (about 1/2 cup), knocking out any excess sugar. The reason for doing this is so that the soufflé batter can rise easily within the vessel as it bakes in the oven.

We did the same with the foiled "ramekins" that Chef Chang said we'd prepare the batter for, but would be saved to bake at home. The soufflé within the porcelain ramekin would be eaten at the end of class.

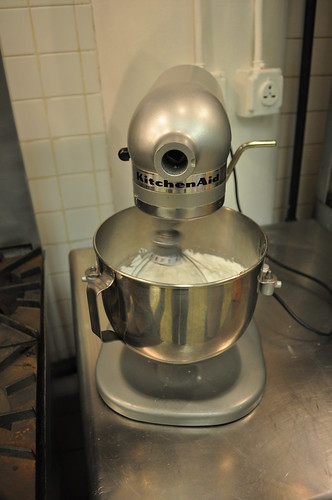
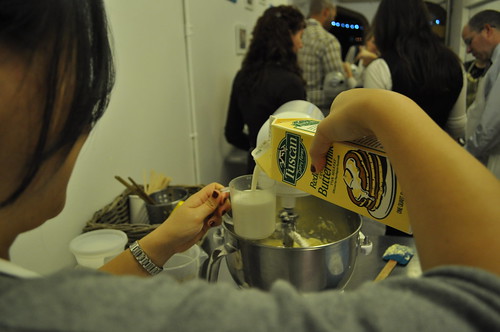
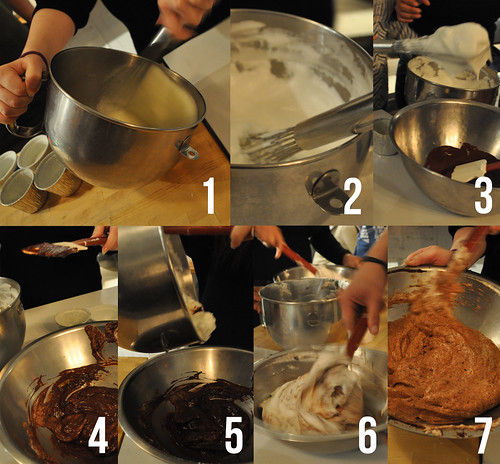
Next, we placed 250 grams of egg whites, 3 grams of cream of tartar (lemon juice can substituted), and a pinch of sugar in a large bowl, {1} whipping (you can also use an electric mixer for this, haha) the egg whites, gradually adding 120 grams of granulated sugar to the mix {2} until we got stiff peaks (evidenced better in 3). This became our meringue.

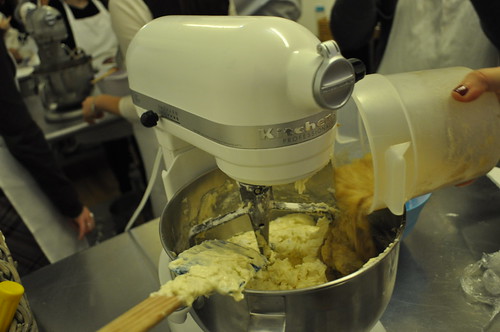
While we were whipping the whites, Chef Chang had his assistant melt 150 grams of 70% dark chocolate over a double-boiler over simmering water, stirring occasionally. Chef Chang said it was very important that the chocolate still be warm/hot from the double boiler when combining it with the meringue. Same goes for the meringue -- he emphasized that we should not wait too long before combining with the chocolate. Otherwise, the chocolate fails to cohesively meld with the meringue (and instead, yielding chunks of chocolate chips in the mixture), and the meringue risks becoming too stiff.

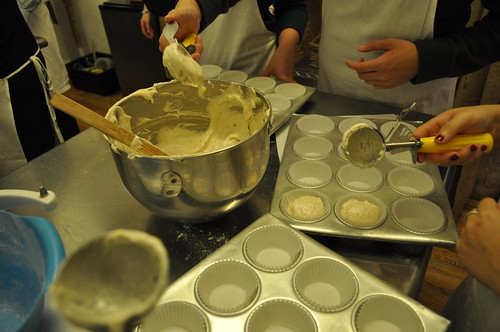
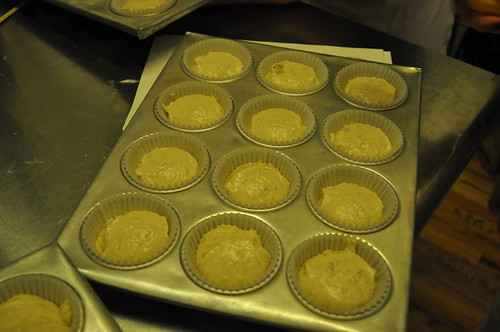
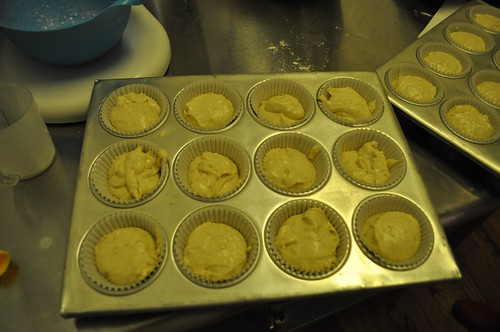
{1} Similarly to how we transferred the macaron mixture to the piping bag, Chef Chang showed us the same method for transferring the soufflé mix for us to pipe into our ramekins. {2} Only difference is we used the same piping bag without the straight tip, just cutting a half-inch hole at the closed end of the piping bag. We piped straight down (90 degrees) into the ramekins, {3} using an offset spatula to level the tops of the ramekins so that the soufflé mix is evenly lined up within the ramekin. {4} There was one final touch we
had to do before we could put the ramekins into the oven -- we ran our thumbs along the inside edge of each ramekin rim. This is done so that the soufflés can properly rise without sticking to the rim of the ramekins. {5} Our ramekins were ready to be baked on the middle rack of the oven, {6} until they rose, forming a crust on top, but were still "jiggly" in the center, approximately 10-12 minutes, depending on the size of ramekins used.

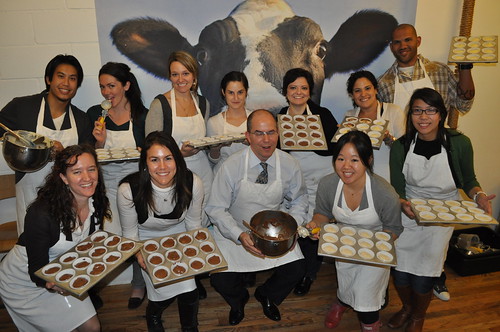
And voilà! Marcus and I successfully made some pretty awesome soufflés -- they rose and everything :P! Plus, they tasted absolutely delicious, if I do say so myself! Sufficiently moist with an smooth and airy texture -- fluffy as can be and perfectly rich (just the right amount of bittersweet) chocolate. Almost like biting into a cloud, as I've heard someone describe before, only slightly firmer. I left, in awe, of the wonderful soufflés that Marcus and I made at the workshop together. So I guess the near impossible reputation and fastidious nature of the soufflé can be, indeed, conquered.

Findings: I have to say, after all this, DessertTruck Works offers some pretty comprehensive advanced baking workshops, easily accessible by baking novices and experienced baking veterans alike (more emphasis on the novices, of course). Chef Jerome Chang has a no-nonsense approach to the bakery's intensive workshops (whether it be for the fussy macaron or the scrupulous soufflé). His straightforward recipes and succinct explanations (for both background and procedure) during the workshops are key to their success. Chef Chang was able to say exactly why the recipe is written a certain way (e.g., why we use room temperature egg whites, why we butter and sugar ramekins) -- this makes for a more effective understanding of why the said recipe works, and it'll help you remember in the future when you're tasked with executing the recipe on your own. I also liked that it wasn't just a "demonstration" but a very hands-on experience -- your hands will get messy with flour and all sorts of baking tools and goodies.

In summary, I highly recommend the two current workshops (i.e., macaron-baking and soufflé-making) offered at DT Works, especially if you can nab a Groupon deal or two for them! Definitely go accompanied (makes it more fun!), and I promise you'll learn a lot, make great baked goods, and eat deliciously!

Price point: a two-hour macaron-baking class (and a half dozen macarons) for $45, a two-hour chocolate soufflé-making class (and two soufflés -- one baked and one unbaked to take home) for $85; $22 and $39 with Groupon, respectively.

--June 5, 2011 and December 27, 2011

DessertTruck Works
6 Clinton Street
New York, NY 10002
http://www.dt-works.net

Groupon
DessertTruck Works macaron-baking and soufflé-making class deals available here* and here*!

* These deals are no longer available at the moment, but keep your eyes peeled! Sign-up for Groupon, and maybe they will offer the deals again soon. Since taking this class, I've seen Groupon offer the deal one more time, so chances are, they'll be back!

Monday, April 11, 2011

Cooking Class | Classic French Macarons at ICE

As a Valentine's Day gift to Marcus and as a Christmas gift to Erin, I signed the three of us up for a Classic French Macaron baking class at the Institute of Culinary Education (aka ICE) over at the Flatiron District. How did I hear of this class, you ask?


Well my dear friend Linda, my culinary soul sister, told me about it while back. We got around to discussing how much we love macarons when she mentioned that she and her husband had taken an intense macaron-making class at ICE and how she learned to appreciate the hard labor behind those tiny French pastries that cost about $2-4 a pop. I had been scouting out for availabilities on the website since last August until I was able to find something for April when ICE opened its Spring semester registration in early December. When I had checked back in August, all the macaron classes listed were either sold out or were themed macaron classes (e.g., holiday macarons, savory macarons, etc.), and while the latter would've been really interesting, I wanted my first macaron baking experience to be for the classic kind. That being said, I promised myself I would hold out until I saw the class reappear again, and low and behold, it did!


We arrived about 15 minutes before the scheduled time of 6 PM (did I forget to mention this class is four hours long?!) and received our welcome packet filled with instructions for the class. The class (and all of the macaron classes over at ICE) is run by pastry chef-instructor, Kathryn Gordon, co-author of the upcoming cookbook, Les Petits Macarons: Colorful French Confections to Make at Home. She studied at L’Académie de Cuisine in Maryland and has worked/staged in the renowned pastry kitchens of Rainbow Room, Tavern on the Green, Le Cirque, Le Bernardin, and Osteria del Circo. She used to compete a lot in many pasty competitions, now seldom competing, but she still provides commentary for bread and pastry championships for the Food Network. Before she committed to her calling in the pastry arts, she had a career on Wall Street, which I find really fascinating, as I wonder if I could ever be that bold and move away the bean-counting party of my life. But alas, that is another thought for another day.

Anyways, we began class with 18-20 or so students sitting around a prep table in one of the kitchen classrooms, where Chef Gordon debriefed us with a brief introduction about French macarons, the ingredients they require (almond flour, egg whites, powdered sugar, and meringue), and the three general techniques to make the cookie part of the macaron (French/ordinary/common/cold, Italian, and Swiss). She referred to French macarons as the "world's moodiest cookie" as well as the "controversial cookie" in the world of Meilleurs Ouvrier de France (aka MOFs, a title of Best Pastry Chef of France).

During class that day, she taught us the Italian method to make meringue for these macarons. It is the strongest of the three methods I mentioned previously and is the same technique used to make buttercream and nougat candy. Chef Gordon told us she finds Italian-based meringues don't spread as much (due to the use of sugar syrup and the way it "cooks" the egg whites as they are beaten by the mixer). The Italian method also has the highest "shine" because the sugar is fully melted into the batter (per the recipe's instructions).

Prior to attending this class, Erin and I had attempted to make French macarons from scratch, and let me tell you how messy, frustrating, and time consuming it got, even when we followed the wise words from Martha Stewart herself. They looked ugly, deflated, and grotesque, and we couldn't figure out why. When Chef Gordon asked if any of us had any experience making French macarons during the debrief, everyone who had reported unfavorable results. All of Chef Gordon's explanations for the problems our classmates ran into were explanations for all the things that went wrong with our macarons. Basically, everything that could go wrong with macarons went wrong with ours!


After the debrief, she paired us up (me with Marcus; Erin with Lauren, another girl from class that day) and sent us to our work stations, stocked with standard KitchenAid mixers, digital scales, a food processor, and any basic kitchen tools we needed. I found it interesting how the outlet plugs hung above the work stations as having electrical wiring along the sides of the kitchen would be much of a safety hazard. Very pragmatic!

Because the recipe is quite long and complex, I won't be able to sum it up here, but I'll give you the highlights of what went on during our four-hour macaron-baking intensive class. Marcus and I got to a late start because one of the members of our class stole our digital scale (those scoundrels!), and we were having trouble with cooking the sugar syrup to the exact temperature required (as it is the key ingredient to the Italian-based meringue). Luckily, Chef Gordon was super helpful and very resourceful (undoubtedly with her past experience in professional pastry kitchens) when we ran into any trouble or had any questions. She understood this mysterious French pastry from its complex core to its delicate exterior--once she saw the problem we were having, she knew exactly how to remedy it (or would just tell us to start over because it was too late to repair). After redoing our meringue, we were able to pipe the macaron cookies onto Silpat, a silicone non-stick baking mat.

A similar thing happened when we were making the pistachio buttercream, what we chose for the fillings of our macarons (which required cooking light corn syrup in the same fashion as the sugar syrup--to a particular temperature, without actually having a thermometer).


Our friend, Mr. Chrome KitchenAid Mixer, whipping our egg whites for the pistachio buttercream filling. We mixed in butter, heated light corn syrup, and pistachio paste later on in the process.


The rest of the class finishing piping their macarons, while Marcus and I were finishing up our filling.


Once we finished our buttercream, our cookies were finally ready! Notice our macarons are slightly tinted green (Marcus's idea) so it could appropriately match our pistachio-flavored filling. Also, it made ours stand out because the rest of the class did white, red, or purple.


Erin piping her purple macarons with cappuccino ganache.


Our piping bag!


Our pistachio macarons, post-piping!


I thought taking a photograph from the side would be interesting--love how it turned out!


The rest of our post-piped macarons. I snuck a bite of one of our macarons--it was definitely comparable to pistachio macarons I've had before!


Gathering the rest of the class's macarons to take home, which includes Fleur de Sel caramel macarons, blueberry jam macarons, cappuccino macarons, and of course, pistachio macarons. I have to say that I liked our green ones best, but then again, pistachio always seems to win me over!


Erin's baking partner, Lauren, with me and Erin in the trenches of French macaron baking.

Findings: I found this class really informative about all that is involved with baking French macarons--from the theory behind macaron-making to the numerous approaches to make them at home. The class helped hone our piping skills, overall baking knowledge, and macaron recipe repertoire. It was quite an intense four-hour class--lots of information was packed in that period of time, so it was a tad bit overwhelming, especially for individuals that may not have been familiar with general baking knowledge and/or skills beforehand. I would love to go back for a themed-macaron baking class now that I have a better understanding of how the overall baking process works, so I could be more efficient and learn more about other flavors and fillings!

I highly recommend this class for anyone who has had some exposure to basic baking (even if it's Duncan Hines straight-out-of-the-box)--it's definitely not a class for beginners. It is a bit more advanced than that, and since the recipe is basically thrown at you after the debrief meeting, you have to be fast on your feet and act quickly so you don't fall behind! Chef Gordon was very knowledgeable, and her experience and expertise with these little French goodies is very extensive. She has this ability to identify what's wrong just by looking at it, so trust that you'll be in good hands with this class. At $110 per person, you get four hours of instructions with hands-on baking with experienced chef-instructor Kathryn Gordon as a resource (along with two assistant pastry chefs), and the macarons you make to share in class and take home. Like me, you'll definitely leave the class with a deeper appreciation for this complicated cookie (plus, you can finally understand why bakeries and cafés charge the premium that they do for these French delights).

Thanks again to Linda for recommending this class to us!

Price point: $110 per person for a four-hour baking class.

--April 2, 2011

Institute of Culinary Education
Classic French Macarons recreational baking class
50 West 23rd Street
New York, NY 10010
http://rec.iceculinary.com

http://rec.iceculinary.com/Courses/Detail/834

Wednesday, January 5, 2011

Book Signing | Joanne Chang

After watching an episode of Throwdown! with Bobby Flay featuring sticky buns from Joanne Chang's Flour Bakery + Cafe in Boston, I immediately told myself that I needed to make a stop there whenever I found myself in the historic city. I went there two years ago with a bunch of college friends to visit graduate schools, and I absolutely fell in love. The pastries were perfectly scrumptious (Ms. Chang's signature "sticky-sticky buns" lived up to all that hype and then some), and the cafe offerings (I tried a portobello melt and a cup of mushroom barley soup with sweet Italian sausage) used really fresh ingredients and flavors, adding a wonderful homemade feel to them. I've been meaning to go back ever since, so when I found out Ms. Chang had a new cookbook out (one showcasing her bakery's lovely and mouthwatering offerings) and was coming to NYC to sign books, I was totally on it!

Ms. Chang was actually a Harvard alumna who graduated with a degree in Applied Mathematics and Economics. While studying at Harvard, she discovered a dormant penchant for baking. She would bake for friends during study breaks and sell cookies to a local campus cafe. After graduation, she worked at a consulting firm for a couple years, then deciding to drop everything and become a chef/baker. After gaining experience in Boston at Biba and Bentonwood, she moved onto Rialto in Cambridge and then finally to the Big Apple to work for Francois Payard! After spending a year at Payard, Ms. Chang decided to move back to Boston to begin planning to open her own bakery (now Flour). During the planning stages, she took a job at Boston's popular hotspot, Mistral. Two years later, Flour came to be, and subsequently two more locations!


Now with all that background, let's head back to the book signing that night! I asked Marcus to come with me, as we had seen the episode on Food Network together when we first started dating (it was my second time viewing the episode :D). We got there a little early and found her setting up a demonstration at the store for a recipe from her new cookbook!


Per usual, Williams-Sonoma had a bunch of the featured cookbooks displayed along with "related" culinary wares! Notice the copy of the book at the top is opened to the page with Ms. Chang's featured demonstration that night, homemade oreos (located on page 134-135).


Ms. Chang starting her homemade oreo demonstration in the Williams-Sonoma kitchen area.


Along with the general demonstration on how to make homemade oreos, Ms. Chang made some really interesting points:
  • Flour Bakery stresses the use of real butter and chocolate.
  • The touchstone of Flour Bakery and its new cookbook features nostalgic recipes (as many of the bakery's offerings are Ms. Chang's take on the universal American treats (e.g., Oreos, s'mores, Pop Tarts, etc.), that is, childhood desserts recreated. She mentioned how she grew up in a traditional Chinese family, where she "rarely had a chance to indulge her sweet tooth at all" as most Chinese meals tend to end with nothing really sweet--usually orange slices and other assorted fruits.
  • She also talked about how she loves to use unsalted butter when she bakes. Salt is used as a preservative, which means that the salted butter you get in stores may be older than desired. Because the salt content of the butter varies from manufacturer to manufacturer, the product itself is inconsistent. Ms. Chang likes to add her own salt (i.e., kosher salt--the "chef's salt") to recipes, noting that if you'd like to use regular salt instead of kosher salt, you would just tweak her recipes to half the required amount.
  • My favorite part of her demonstration was how she described vanilla to have a "rounding" effect, salt to have a "sharpening" effect, and chocolate to have a "sweetening" effect on baking, respectively. I can't seem to explain why, but I totally follow that train of thought!
  • Throughout her demonstration, she gave little tips on how to execute her homemade oreo recipe smoothly (e..g, how to make the oreo cookie dough round, using salt, whisking techniques, making your own pastry bag for icing/frosting using a Ziploc bag, etc.).


My copy of Flour: Spectacular Recipes from Boston's Flour Bakery + Cafe.


I got to meet Ms. Chang at the end of the demonstration, when she was signing books for attendees. She's so exuberant and eager--everything you need to be a baker! So here's my signed copy: "Eat dessert first!" she wrote--love it!

Findings: Growing up in a Chinese family, I can definitely relate to Ms. Chang's diving head first into baking, especially finding new ways to create nostalgic childhood treats. My mom never baked anything with me while I was growing up. In fact, the first time we baked anything together was when I was home from college! All of my family's weekly meals at home would also be punctuated with fruits (mostly oranges), and on special occasions, a small helping of ice cream. I find her to be such an inspiration--steering the opposite direction from her technical Ivy League degree towards the kitchen takes lots of courage and confidence. I hope one day I can find it in me to trade in my calculator for a toque and an apron! Either way, I'm excited to start making the treats from this book. Her tips from the demonstration were very enlightening and helpful, so I gather her cookbook will do the same. So if you're ever in the Boston area, please make a stop at one of Flour's locations--you won't regret it!

Price point: $35 for each book.

--December 10, 2010

Williams-Sonoma
Time Warner Center
10 Columbus Circle, Suite 114
New York, NY 10019
http://www.williams-sonoma.com/recipe/tip/book-signing-events.html


Flour: Spectacular Recipes from Boston's Flour Bakery + Cafe
Joanne Chang
available here at Amazon.com

Wednesday, December 29, 2010

Cooking Class | Butter Lane cupcakes

In early October, my friend Alice told me about Groupon, a nationwide (but locally focused) daily deal offeror. By promising businesses a minimum number of customers, Groupon gets unbeatable discounts and deals on the best things to do in Manhattan (and several other cities) that can't be found anywhere else--they call it "collective buying power" (i.e., Group + coupon = GROUPON)!


The specific Groupon she told me about was a deal on one cupcake class at Butter Lane (a $50 value) in the East Village at only $25! Butter Lane is one of my favorite bakeries in Manhattan (in fact, I used them to cater cupcakes at my birthday wine tasting last year), so I was sold. Each class lasts two hours with a total of 12 students, and each students gets to bring home a dozen cupcakes! Not a bad deal at $25!


Outside Butter Lane's bakery on the left. The cupcake classes are located next door on the right.


Advertising inside the bakery portion of Butter Lane for cupcake classes!


Inside Butter Lane's bakery! It's a small little place, but the cupcakes are amazing. Its focus is on pure ingredients (e.g., real vanilla beans, real cocoa, dark chocolate)--plus everything is organic! They also offer two types of buttercream, French and American, which makes them different from the typical cupcakery. As the bakery describes, "French buttercream is made with egg whites, butter, and granulated sugar, while American buttercream is made with confectioners sugar and butter. The French is more like a meringue while the American is like the familiar icing we all know." I actually prefer the French buttercream--it has a very rich lightness to it that I enjoy very much.


Inside the baking studio. All workstations are complete with industrial KitchenAid mixers, organic ingredients...


...and baking tools!

Alice and I signed up for a class on November 16, and once we got there, the bakery had cupcakes in the middle for students to nibble on before the class began. Once all the students arrived, the class was divided into three teams of four, and each team was assigned a cupcake type (vanilla, chocolate, or banana) and frosting type (vanilla, chocolate, or cream cheese). Our team consisted of Alice, myself, and a couple, and we were assigned banana cupcakes with cream cheese frosting. Thus, the name Team Banana came to be. Whoo!


Team Banana figuring out how to operate the KitchenAid mixer.


The first step was to combine 1/2 pound of butter and 2.5 cups of granulated sugar in the mixing bowl, combining until the sugar and butter form a cream.


We then cracked three eggs in a separate bowl, adding a splash of vanilla extract to the eggs, then adding all of this to the mixing bowl. We had to mix this all on medium speed until the mixture became light and fluffy. Our instructor told us that we could be very generous with the "splash" of vanilla--can never add too much as it adds a nice flavor to the cupcakes.


More ingredients: 3 cups of cake flour and 1.5 cups of buttermilk!


Next, we combined 1/2 tsp baking powder, 1.5 tsp baking soda, and 1 pinch of salt with the flour.


The instructor told us to add half of the flour mixture followed by the buttermilk, and then add the rest of the flour mixture to the mixing bowl. We then continued to mix until everything was combined, but wary not to overmix.


On a low speed, we added 2 cups of puréed bananas, mixing for one minute.


Then we removed the mixing bowl from mixer and finished mixing by hand. Next, we lined the tins with cupcake liners.


Using a spring-action ice cream scoop, we scooped the batter against the side of the mixing bowl so that the amount scooped didn't overflow the scoop, thereby fitting nicely in the cupcake liner in the tin. Great technique! P.S. the recipe I just recited yields 30 cupcakes!


Alice's completed cupcake tin. Look at how perfect the scooped batter looks here!


My completed cupcake tin. Major FAIL on my end. I can cook very well, but I admit that baking may not be my strongest suit. I need some practice scooping, that's for sure!


Team Vanilla, Team Chocolate, and Team Banana group photo before placing the cupcake tins in the oven at 300°F for 23 minutes!


While the cupcakes were baking in the oven, Team Banana began making cream cheese frosting. Here's the 16 ounces of cream cheese needed! The instructor emphasized that Butter Lane's focus is NOT on sugar, but on cream cheese, which explains why the bakery's buttercream is so amazing!


We combined the cream cheese and 1/2 pound of butter in the mixing bowl, mixing on medium speed for five minutes. After this, we mixed in 8 cups of confectioners sugar at low speed. Once combined, we added a splash of vanilla extract, mixing on medium for three minutes until smooth and fully combined.


Here's our finished cream cheese frosting!


And look at those cupcakes, right out of the oven! It looks like Team Vanilla made a few marble cupcakes, too--love that idea!


Our class getting ready to frost/ice our finished cupcakes!


Me and Alice waiting to frost the cupcakes!


Butter Lane's master froster teaching us some the techniques used to create beautifully frosted buttercream cupcakes. Using a flat, flexible baking spatula, he told us to get a nice round shape (see photo above), then placing it at the center of the cupcake, dabbing as you turn the cupcake.


Showing us the technique again.


His end result--the perfectly frosted Butter Lane cupcake!


My frosted cupcakes! I think I did a little better here than I did with the batter scooping.


Alice's frosted cupcakes! Notice the one on the right is a "special ingredient" buttercream--the recipe isn't provided to the class as Butter Lane wishes to leave its "specialty" items a mystery! The class voted on pumpkin (we had the choice between that, raspberry, blueberry, and cinnamon, I believe), so there it is!

The master froster also had a mini-competition for the students of the class--he said he would walk around to judge who was the best froster in the class. The winner would get a Butter Lane burlap tote in which to carry his/her cupcakes!


Guess who won?! It was a tie between two members from Team Banana! Whoo! Go Alice! See above photo for the one of the winning cupcakes!


The class frosting the last of the cupcakes.


Me and Alice frosting some cupcakes.


The finished products to be taken home and shared!


Alice with her finished cupcakes!

Findings: I thought this class was great--very educational. I learned a lot about ingredients as well as baking techniques with regards to cupcakes. Plus, what a deal--a $25 comprehensive cupcake baking class that comes with a dozen cupcakes at the end! Score! I would still say that it is quite a deal as a dozen cupcakes normally at Butter Lane is $30 (cupcakes alone are $3 each), so really you are paying for a dozen cupcakes plus $20 for the class instruction. Nevertheless, this class is definitely great for team building, a night out with friends, a celebratory party, or even a date! And I promise you'll be in a sugar coma for the next few days, munching on those cupcakes, but no worries--it is well worth it :D! So keep an eye out for future Groupons! And thank you, Alice, for sharing this deal with me--I had a lot of fun!

Price point: a two-hour cupcake class (and a dozen cupcakes) for $50; $25 with Groupon!

--November 16, 2010

Butter Lane
123 East Seventh Street
New York, NY 10009
http://www.butterlane.com


Groupon
http://www.groupon.com
Butter Lane cupcake class deal available here*!

* This deal is no longer available at the moment, but keep your eyes peeled! Sign-up for Groupon, and maybe they will offer the deal again soon. Since taking this class, I've seen Groupon offer the deal one more time, resulting in me purchasing an additional three more Groupons valid for three classes!

LinkWithin

Related Posts Plugin for WordPress, Blogger...